


ターミナルがダサいとモテない。xxfetch 編

いろいろな fetch を使ってオシャレログイン
Photo by Markus Spiske on Unsplash
恵比寿で IT 企業をやっているとモテると聞いて創業しましたが早いことありがたいことに 10 年目に突入した長谷川です。
まだモテる成果は出ていません、、、これからです!(もうめんどくさいのでカウントやめましたw)
xxfetch とは?
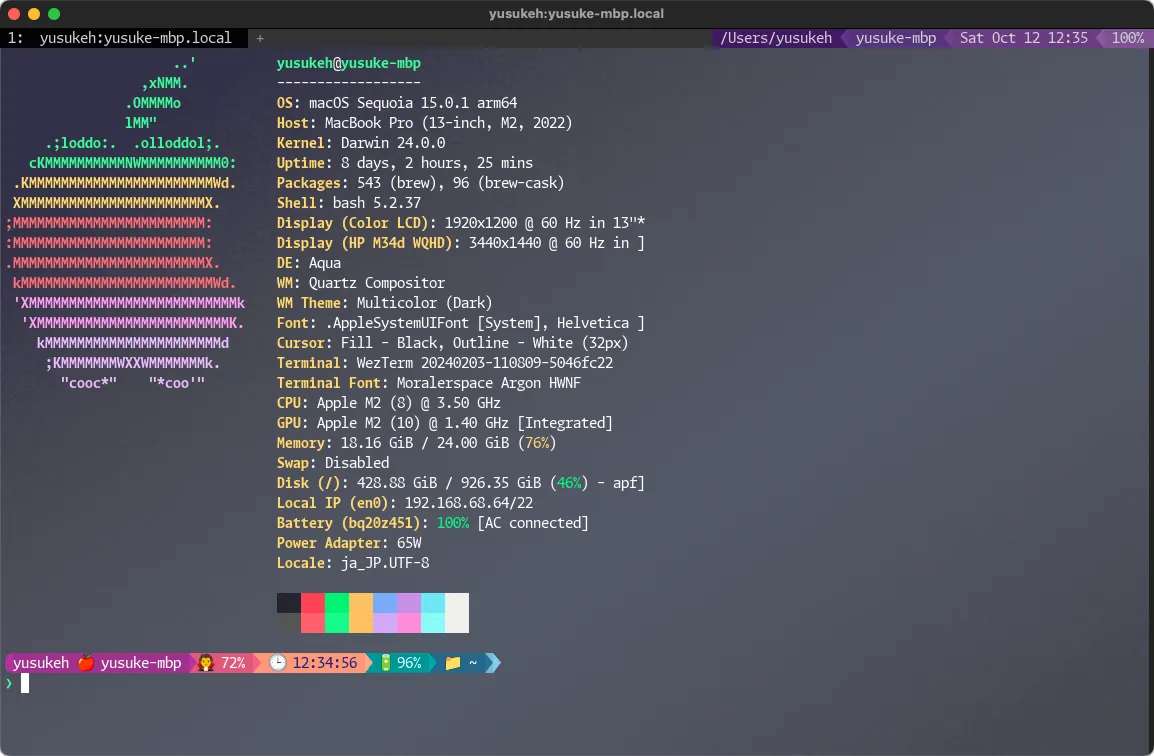
Command-Line で OS 情報や Kernel 情報、CPU や GPU、メモリなどの System Infomation が表示できるツールです。
fastfetch on macOS
もともとが neofetch なのかわからないけど、最近は Awesome Fetch なんてあって笑ってしまったw
GitHub - beucismis/awesome-fetch: Command-line fetch tools for system/other information
こちらを見るといろいろな実装があります。
自分は neofetch を利用していましたが、現在は fastfetch を利用しています。
また git の Directory を fetch してくれる onefetch も利用しています。
ここでは fastfetch と onefetch を紹介していきます。
fastfetch
先ほども screenshot を貼り付けましたが、このような表示をしてくれるツールです。
fastfetch on macOS
Install
homebrew で Install できます。
brew install fastfetchgen-config
fastfetch には gen-config option があります。
これで設定ファイルを生成することができます。
fastfetch --gen-configconfig path は XDG_CONFIG_DIR の下になります。
もしすでにある場合は強制上書きしますが、gen-config-force option もあります。
fastfetch --gen-config-force実際の config は json になっています。
cat ${HOME}/.config/fastfetch/config.jsonc
{
  "$schema": "https://github.com/fastfetch-cli/fastfetch/raw/dev/doc/json_schema.json",
  "modules": [
    "title",
    "separator",
    "os",
    "host",
    "kernel",
    "uptime",
    "packages",
    "shell",
    "display",
    "de",
    "wm",
    "wmtheme",
    "theme",
    "icons",
    "font",
    "cursor",
    "terminal",
    "terminalfont",
    "cpu",
    "gpu",
    "memory",
    "swap",
    "disk",
    "localip",
    "battery",
    "poweradapter",
    "locale",
    "break",
    "colors"
  ]
}
logo
また logo は画像を表示することもできます。
例えば自分は WezTerm を利用しているので、logo type は iterm を使えば画像を表示することもできます。
fastfetch --iterm [image file]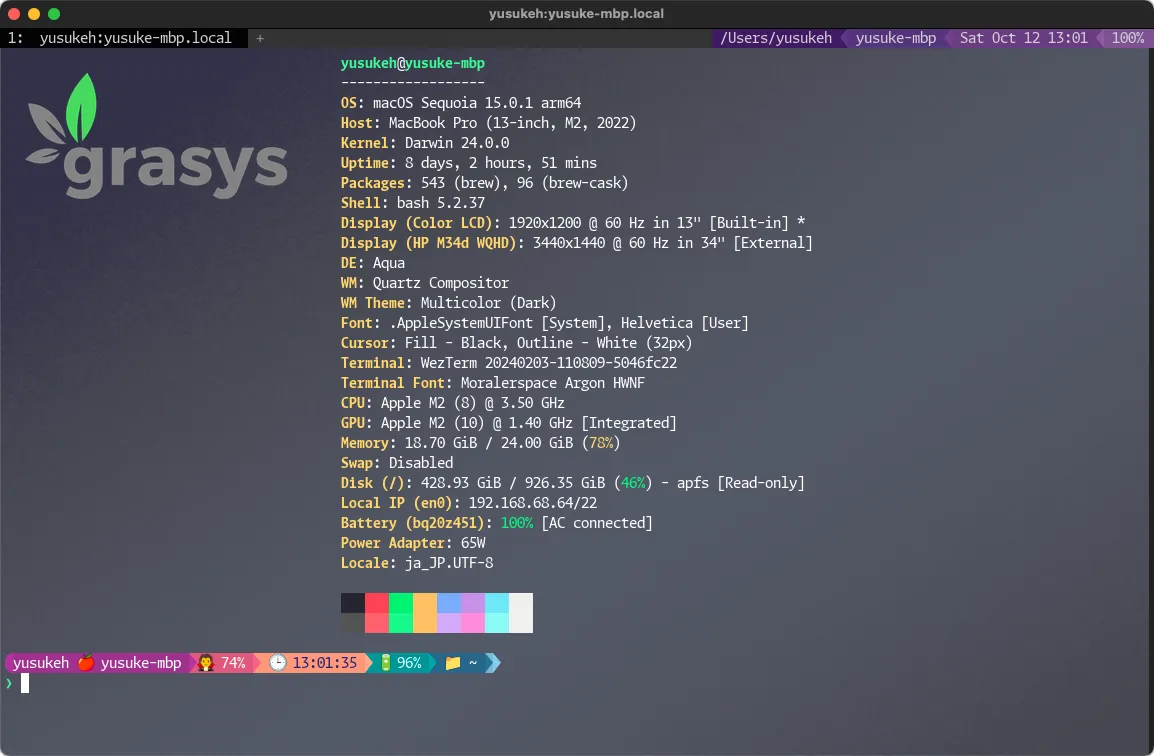
fastfetch/presets/examples/2.jsonc at dev · fastfetch-cli/fastfetch
{
    "$schema": "https://github.com/fastfetch-cli/fastfetch/raw/dev/doc/json_schema.json",
    "logo": {
        "type": "iterm",
        "source": "~/Desktop/apple1.png",
Setup
.bashrc などの最後あたりに以下のような記述をして組み込んでいます。SHLVL を指定してる理由は tmux や neovim から Terminal を開いた場合にちょっと邪魔で表示しないようにしてる
今のところこれで特に問題ないかな・・・
#################################################
### fastfetch
if command -v fastfetch &> /dev/null; then
  if [ ${SHLVL} -eq 1 ]; then
    fastfetch
  fi
fi
onefetch
git の directory の git infomation を表示するツールです。
自分は cd した時に git なのかを確認するのに使っています。
GitHub - o2sh/onefetch: Command-line Git information tool
Install
普通に homebrew にあります。
brew install onefetchあとは git の directory で普通に onefetch を叩くだけです。
自分がよく使ってる mustache の bash版を git clone してみましょう。
GitHub - tests-always-included/mo: Mustache templates in pure bash
test ! -d work && mkdir work
git clone --depth 1 https://github.com/tests-always-included/mo.git work/mo
cd work/mo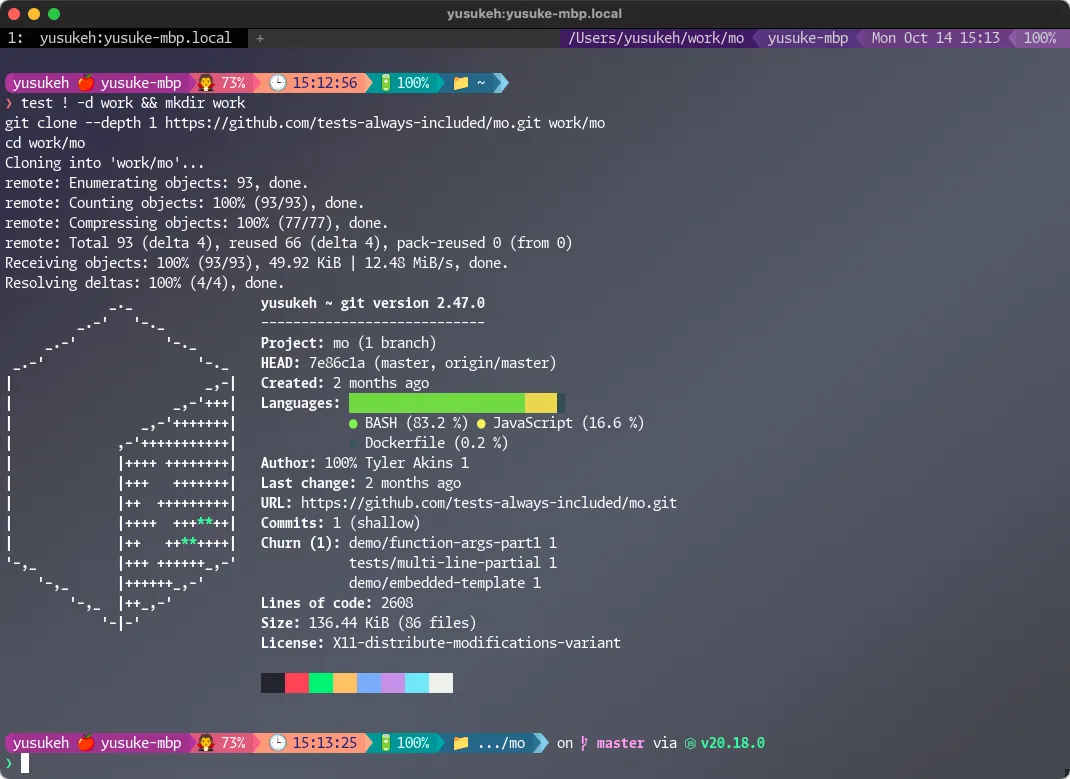
こんな感じで表示してくれます。
bash が 83.2%
cd した directory が git だったら自動的に onefetch を実行するようにします。
getting-started の ”By @quazr-omega” のサンプルが参考になります。
# git repository greeter
last_repository=
check_directory_for_new_repository() {
 current_repository=$(git rev-parse --show-toplevel 2> /dev/null)

 if [ "$current_repository" ] && \
    [ "$current_repository" != "$last_repository" ]; then
  onefetch
 fi
 last_repository=$current_repository
}
cd() {
 builtin cd "$@"
 check_directory_for_new_repository
}

# optional, greet also when opening shell directly in repository directory
# adds time to startup
check_directory_for_new_repository
自分は cd を zoxide で bash を使っているので以下のようにしています。
.bashrc などに
# onefetch
if command -v onefetch &> /dev/null; then
  declare -x LAST_REPOSITORY=""
  _check_directory_for_new_repository() {
    CURRENT_REPOSITORY=$(git rev-parse --show-toplevel 2> /dev/null)
    if [ "${CURRENT_REPOSITORY}" ] && [ "${CURRENT_REPOSITORY}" != "${LAST_REPOSITORY}" ]; then
      onefetch
    fi
    LAST_REPOSITORY=${CURRENT_REPOSITORY}
  }

  _check_directory_for_new_repository
fi

# zoxide
if command -v zoxide &> /dev/null; then
  eval "$(zoxide init --hook pwd $(basename ${SHELL}))"
  function cd(){
    z "$@"

    # onefetch
    if [ -d .git ]; then
      _check_directory_for_new_repository
    fi
  }
fi
これで git の directory に移動すると onefetch が表示されるようになります。
GitHub - beucismis/awesome-fetch: Command-line fetch tools for system/other information
たまに表示がうるさいけどね・・・
お客さんのサーバに入れるわけにはいかないけど、社内のインスタンスなどにはこれらを仕込んで間違えないようにしています。
ターミナル環境について他の記事も書いているので、よろしければこちらもご覧ください!
『ターミナルがダサいとモテない』シリーズ一覧
この記事を書いた人