


ターミナルがダサいとモテない。bash command-line framework rerun編

bashのmodule型command-line framework rerun

Photo by Alejandro Escamilla on Unsplash
恵比寿でIT企業をやっているとモテると聞いて創業しましたが早いことありがたいことに10年目に突入した長谷川です。
まだモテる成果は出ていません、、、これからです!(もうめんどくさいのでカウントやめました😆)
もともとargcを書いていたのですが、rerunを書いていて長くなりすぎるので分割しました😅
rerun
rerun — Take your shell scripts and turn them into powerful full featured management utilities with no extra programming.
と書かれているようにめちゃくちゃパワフルです。
ModuleとCommandに分かれているため、独立した形でModuleを作れば、配布することもできます。
RERUN_MODULE_DIRで設定したDirectoryをModuleを読み込み利用できるようにすることができます。
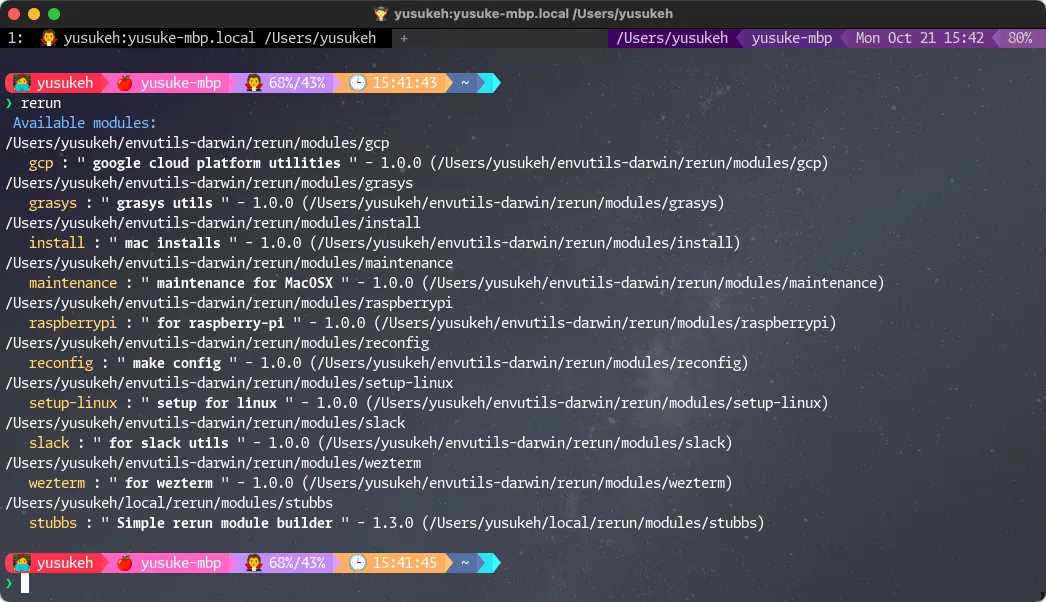
これは実際の自分のrerun modulesです。
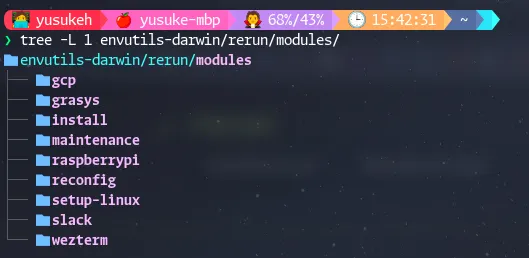
以下のようなtreeで保存していて、macの構成や何か良くする作業などのcommandをまとめています。
例えばmodule installの中はこのようになっています。
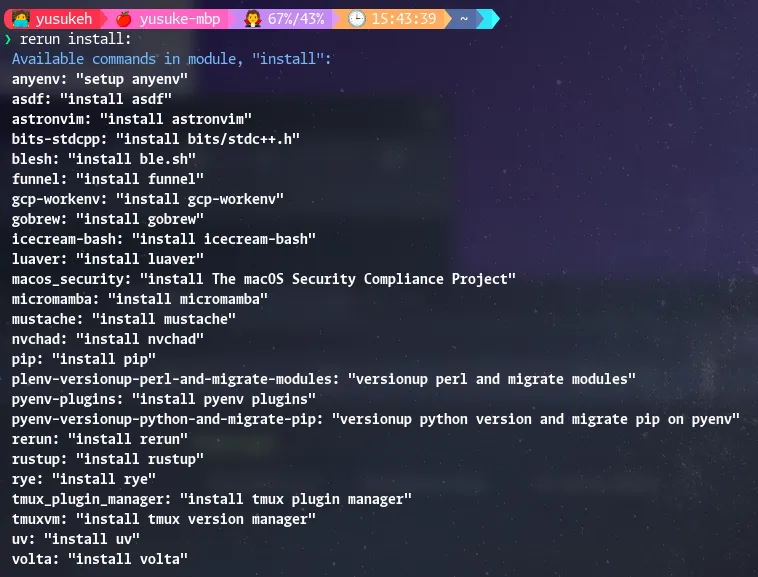
最近ではpyenvは使わなくなったし、ryeもuvに移行したので使わなくなりました。
極稀にですが、InstallされたあとのDirecoryを綺麗にしたくなる衝動に駆られるため、Install用のcommandをまとめています。
Get yusuke’s stories in your inbox
Join Medium for free to get updates from this writer.Subscribe
例えばmodule weztermの中にはunsplashというコマンドがあります。
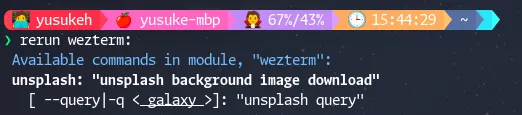
weztermの背景をunsplashのAPIで変えるためのコマンドです。
rerun wezterm: unsplash
このscriptは内容も軽いので今回はこれを紹介します。
stubb: add-module
rerunにはstubというhelper moduleがあります。
rerun/modules/stubbs at master · rerun/rerun
rerun stubbs:
 Available commands in module, "stubbs":
 add-command: "add command to module"
    --command|-c <  >: "the command name"
    --description <  >: "the brief description"
    --module|-m <  >: "the module name"
   [ --overwrite < false >]: "should overwrite?"
   [ --generate-help < true >]: "generate help usage option? (-?|--help)"
 add-module: "add a new module"
    --description <  >: "the brief description"
    --module|-m <  >: "the module name"
   [ --template <  >]: "the template name or path"
 add-option: "add a command option"
   [ --arg < true >]: "option takes argument?"
    --command|-c <  >: "the command name"
   [ --default|-d <  >]: "default value"
    --description <  >: "the brief description"
   [ --export < false >]: "export variable?"
   [ --long <  >]: "long option name"
    --module|-m <  >: "the module name"
    --option|-o <  >: "the option name"
   [ --required < false >]: "option required?"
   [ --short <  >]: "short option name"
 archive: "build an archive of rerun and modules"
   [ --file|-f <  >]: "file name"
   [ --format|-f < sh >]: "output format"
    --modules < "'*'" >: "modules glob pattern"
   [ --release < 1 >]: "the archive release number"
   [ --version < 1.0.0 >]: "the archive version number"
   [ --template <  >]: "the template name or path"
 docs: "generate the docs"
   [ --dir <  >]: "the directory path"
    --module|-m <  >: "the module name"
 edit: "edit a command script"
    --command|-c <  >: "the command name"
    --module|-m <  >: "the module name"
 migrate: "Migrate 0.9 modules to the 1.0 module format"
    --module|-m <  >: "the module name"
 rm-command: "remove a command"
    --command|-c <  >: "the command name"
    --module|-m <  >: "the module name"
 rm-option: "remove a command option"
    --command|-c <  >: "the command name"
    --module|-m <  >: "the module name"
    --option|-o <  >: "the option name"
 test: "run module test scripts"
   [ --answers <  >]: "option answer file"
    --module|-m <  >: "the module name"
   [ --plan|-p <  >]: "the test plan"
これを使ってModuleを作成します。
rerun stubbs: add-module --module wezterm --description "for wezterm"これで空のmodule weztermができました。
stubbs: add-command
rerun stubbs: add-command --module wezterm \
  --command unsplash \
  --description "Change the background of wezterm using the unsplash API"
そうすると${RERUN_MODULE_DIR}/wezterm/commands/unsplashに3個のファイルが生成されます。
-
metadata
-
options.sh
-
script
ここではscriptを使います。
vi ${RERUN_MODULE_DIR}/wezterm/commands/unsplash/script以下の行の下に実際のscriptを書いていくイメージです。
# Command implementation
# ----------------------
xxxxxxxxx
xxxxxx
xxxxxx# Command implementation
# ----------------------
declare -A unsplash=(
# unsplash ramdom API
["url"]="https://api.unsplash.com/photos/random"
# unsplash access key
["access_key"]="xxxxxxxxxxxxxxxxxxxxxxxxxxxxxxxxx"
["response_json"]="${HOME}/.config/wezterm/unsplash.json"
# 実際のdownloadされるunsplashのが画像
["download_file"]="${HOME}/.config/wezterm/unsplash.jpg"
# weztermのconfig directory
["cwd"]="${HOME}/.config/wezterm"
)echo "request api: ${unsplash["url"]}?client_id=${unsplash["access_key"]}&query=${QUERY}"
echo "response json: ${unsplash["response_json"]}"
curl -s -o ${unsplash["response_json"]} \
"${unsplash["url"]}?client_id=${unsplash["access_key"]}&query=${QUERY}"
declare image_url=$(cat ${unsplash["response_json"]} | jq -r .urls.full)
echo "image url: ${image_url}"
echo "download: ${unsplash["download_file"]}"
curl -s -o ${unsplash["download_file"]} ${image_url}
wezterm imgcat --height=50% ${unsplash["download_file"]}stubbs: add-option
rerunのcommandにはoptionを追加できます。
ここではunsplash APIのquery parameterだけ可変できるようにしました。
default値はgalaxyにしてます。
rerun stubbs: add-option \
  --module wezterm \
  --command unsplash \
  --arg true \
  --default galaxy \
  --export true \
  --required false \
  --long query \
  --option query \
  --short q \
  --description "unsplash API query parameter"
実際に実行すると・・・
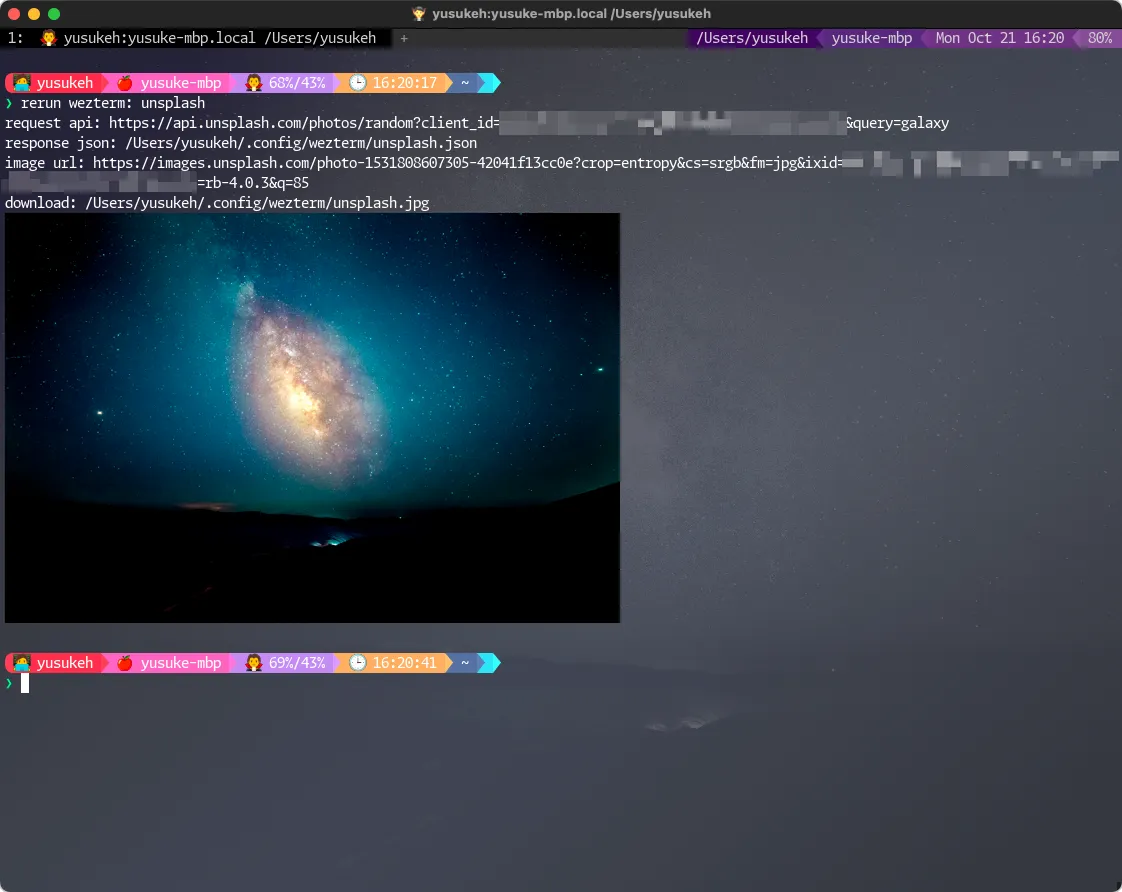
unsplash APIのaccess keyが入ってるので😎してます。
query optionにforestを入れると以下のようになります。
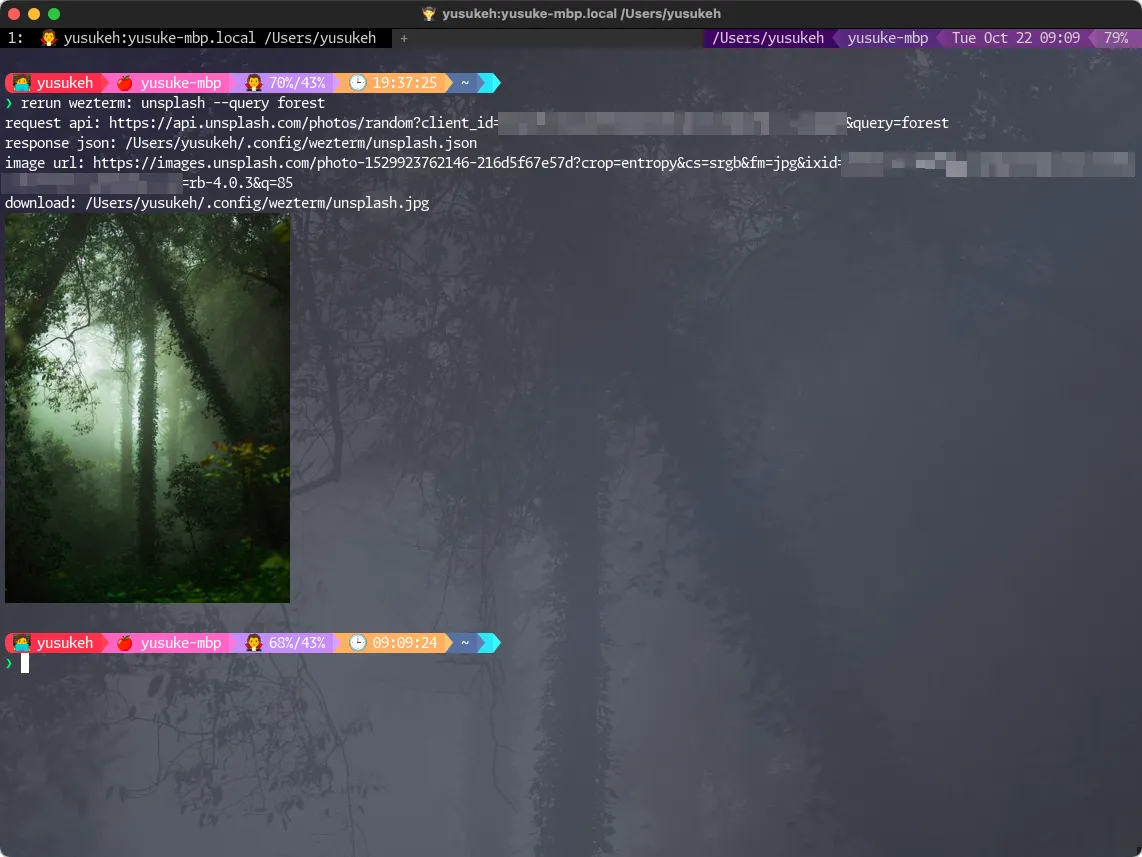
wezterm config
あとは${HOME}/.config/wezterm/wezterm.luaに以下のような設定をいれればファイルを差し替えるだけで背景画像が変わります😁
-------------------------------------------------------------------------------
-- background
config.background = {
 {
  source = { File = wezterm.config_dir .. "/unsplash.jpg" },
  height = "Cover",
  --width = "Cover",
  hsb = {
   brightness = 0.3,
   hue = 0.2,
   saturation = 0.2,
  },
  opacity = 0.2,
 },
}
変える必要があるのかという野暮なツッコミは受けません🤣
rerunはModule型になっているため、そのModuleだけを配布することで簡単に各種scriptを配布できるのがメリットです。
自分はmacosのセットアップやメンテナンス、会社で必要な確認コマンドなどをまとめて管理しています。
これらをmacosの入れ替えのタイミングなどでgit化しておけば、cloneするだけで一通りの作業を開始できる環境を構成できます。
昔はAppleのtimecupsuleが便利でtimemachineも使ってたけど、NASを配置しなきゃいけない、最近のmacbook proはSDカードスロットが無いなどでやめてしまいました。
新しいmacbook proはSDカードスロットが復活しましたね
オレのはまだ旧型のmacbook pro 13inchなので😅
新型に交換したらまた管理手法がちょっと変わるかもしれないです。
ターミナル環境について他の記事も書いているので、よろしければこちらもご覧ください!
『ターミナルがダサいとモテない』シリーズ一覧
この記事を書いた人