
目次
grasys 加藤です。
入社するまでGoogle Cloud (GCP) Platformに触ったこともなく、インフラエンジニアでもなかったのですが、入ってからは息をするように毎日触っています。
今回は最初の一歩、Google Compute Engineでインスタンスを作成する3つのパターンをご紹介します。
- Google Cloud (GCP) Console
- gcloudコマンド
- Terraform
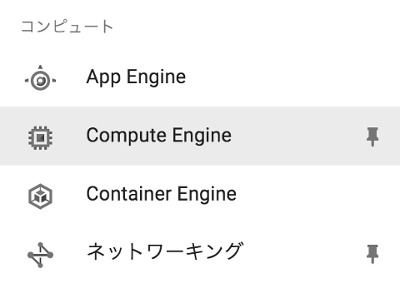
1.Google Cloud (GCP) Consule
Webの画面からGUI操作でインスタンスを作成することができます。
恐らく一番わかりやすい方法です。Quick Startでも紹介されています。
1.メニューから Compute Engine 画面に移動します。
2.インスタンスを作成 を選択します。

3.必要な項目を入力して、 作成 でインスタンスを作り始めます!

インスタンス起動は他社クラウドと比較するとかなり高速です。
ただしGoogle Cloud (GCP) Consoleは若干のタイムラグがあるのであまり速さに気が付かないかも・・・ 他の2つの方法だと実感できるかと思います。
2.gcloudコマンド
GUIは入力コストが高く、同一構成作ろうとして選択ミスもします。やはりコマンド入力が間違いありません。Google Cloud (GCP) Platform は gcloudコマンド が用意されています。
さきほどのGUIと同じ構成の場合は次のコマンドになります。
gcloud compute instances create instance-1 \
    --boot-disk-size 10GB \
    --boot-disk-type pd-standard \
    --image-project debian-cloud \
    --machine-type n1-standard-1 \
    --scopes cloud-platform \
    --zone us-east1-c
む、 --image debian-8-jessie-v20160803 指定だと見つからないとエラーがでます。(2016/9/15)
image-project/familyが最近指定できるようになったからかな?
運用ではimageは自分で作ったものを指定することが多いですね。
$ time gcloud compute instances create instance-1 \
>    --boot-disk-size 10GB \
>    --boot-disk-type pd-standard \
>    --image-project debian-cloud \
>    --machine-type n1-standard-1 \
>    --scopes cloud-platform \
>    --zone us-east1-c
WARNING: You have selected a disk size of under [200GB]. This may result in poor I/O performance. For more information, see: https://developers.google.com/compute/docs/disks#pdperformance.
Created [https://www.googleapis.com/compute/v1/projects/your-project/zones/us-east1-c/instances/instance-1].
NAME        ZONE        MACHINE_TYPE   PREEMPTIBLE  INTERNAL_IP  EXTERNAL_IP     STATUS
instance-1  us-east1-c  n1-standard-1               10.240.0.15  104.196.172.61  RUNNING

real    0m28.828s
user    0m0.429s
sys     0m0.086s
実際にコマンドを発行してみると起動にかかるのは30秒弱。
この後すぐにSSHして使いはじめることができます。速い!
これでgcloudシェルでwrapしてループさせれば100台でも作れます?
時間かかりすぎで待っていられません。あくまで1台パッと立てる時専用です。
そこで便利な Terraform です。
3.Terraform
プロビジョニングツールとしてHashiCorpがリリースしている Terraform を使用します。 インストールして、ドキュメントを参考にJSON形式のconfigを作成します。
main.tf
provider "google" {
  project      = "your-project"
  region       = "us-east1"
}

resource "google_compute_instance" "default" {
  name         = "${format("instance-%01d", count.index+1)}"
  count        = "1"
  machine_type = "n1-standard-1"
  zone         = "us-east1-c"

  disk {
    image = "debian-8-jessie-v20160803"
    size  = "10"
  }

  network_interface {
    network = "default"
    access_config {
      // Ephemeral IP
    }
  }

  service_account {
    scopes = [ "cloud-platform" ]
  }
}
この設定ファイルがあるディレクトリでコマンドを実行するとインスタンスを作成してくれます。
$ time terraform apply
provider.google.credentials
  Enter a value:

google_compute_instance.default: Creating...
  can_ip_forward:                                      "" => "0"
  disk.#:                                              "" => "1"
  disk.0.auto_delete:                                  "" => "1"
  disk.0.image:                                        "" => "debian-8-jessie-v20160803"
  disk.0.size:                                         "" => "10"
  machine_type:                                        "" => "n1-standard-1"
  metadata_fingerprint:                                "" => "<computed>"
  name:                                                "" => "instance-1"
  network_interface.#:                                 "" => "1"
  network_interface.0.access_config.#:                 "" => "1"
  network_interface.0.access_config.0.assigned_nat_ip: "" => "<computed>"
  network_interface.0.address:                         "" => "<computed>"
  network_interface.0.name:                            "" => "<computed>"
  network_interface.0.network:                         "" => "default"
  self_link:                                           "" => "<computed>"
  service_account.#:                                   "" => "1"
  service_account.0.email:                             "" => "<computed>"
  service_account.0.scopes.#:                          "" => "1"
  service_account.0.scopes.1733087937:                 "" => "https://www.googleapis.com/auth/cloud-platform"
  tags_fingerprint:                                    "" => "<computed>"
  zone:                                                "" => "us-east1-c"
google_compute_instance.default: Creation complete

Apply complete! Resources: 1 added, 0 changed, 0 destroyed.

The state of your infrastructure has been saved to the path
below. This state is required to modify and destroy your
infrastructure, so keep it safe. To inspect the complete state
use the `terraform show` command.

State path: terraform.tfstate

real    0m25.430s
user    0m0.129s
sys     0m0.050s
ここで複数台を起動したい時には count = "1" を書き換えます。試しに count = "100" としてみましょう。もちろん100台起動する設定です。
実際に起動させるとちょっと課金が気になるのでテストコマンドで確認します。
$ terraform plan
~99台分のログ~
Plan: 99 to add, 0 to change, 0 to destroy.
簡単にたくさんのインスタンスを立てられそうですね。
Google Compute Engineは分単位の課金(10分から)なのですぐに止めれば100台でも17台✕1時間の課金で済みますw
お掃除
- 削除アイコンを押す。
gcloud compute instances delete instance1 --zone=us-east1-cを実行する。terraform destoryを実行してyesとタイプする。
この他にもPythonやRESTからAPIを呼んでインスタンスを作成することも可能ですし、terraform以外にもGoogle Cloud (GCP) Platformに対応しているプロビジョニングツールはありますが機会があれば。
株式会社grasys(グラシス)は、技術が好きで一緒に夢中になれる仲間を募集しています。
grasysは、大規模・高負荷・高集積・高密度なシステムを多く扱っているITインフラの会社です。Google Cloud (GCP)、Amazon Web Services (AWS)、Microsoft Azureの最先端技術を活用してクラウドインフラやデータ分析基盤など、ITシステムの重要な基盤を設計・構築し、改善を続けながら運用しています。
お客様の課題解決をしながら技術を広げたい方、攻めのインフラ技術を習得したい方、とことん技術を追求したい方にとって素晴らしい環境が、grasysにはあります。
お気軽にご連絡ください。