目次
WezTerm をお使いですか?
恵比寿で IT 企業をやっているとモテると聞いて創業しましたが早いことありがたいことに10年目に突入した長谷川です。
まだモテる成果は出ていません、、、これからです!(2回目)
前回グチを言ったので今回は言いませんw
今回は WezTerm の紹介をしていきます。
シリーズ記事一覧
WezTerm
最近 WezTerm のことを書いている Post も増えてきて WezTerm User も増えてるんだと思います。
A GPU-accelerated cross-platform terminal emulator and multiplexer written by @wez and implemented in Rust
github にもある通りで以下の特徴があります。
WezTerm の特徴(ざっくり)
- Rust で書かれてる
- Cross-Platform
- GPU-Accelerated
- Multiplexer(tmux や zellij や screen 要らず)
- Lua で Config
- Memory 消費が軽い
個人的にめっちゃ重要
- 背景を透過できる
- 背景ボカシができる
- Dracula Theme がある
個人的には Config も Lua で育てていく感じが NeoVim 感があって好きです。
WezTerm – Wez’s Terminal Emulator
Install
Cross-Platform といいつつ、自分は macOS なので macOS 専用です。
homebrew にあるので、以下のコマンドで簡単に Install できます。
brew install --cask weztermConfig
Config の Path はこちら
いわゆる XDG_CONFIG_HOME です。
${HOME}/.config/wezterm/wezterm.luamacOS – Wez’s Terminal Emulator
まず起動しても良いし、以下のコマンドで directory と configfile を作っても良いです。
test ! -d ${HOME}/.config/wezterm && mkdir ${HOME}/.config/wezterm
test ! -f ${HOME}/.config/wezterm/wezterm.lua && touch ${HOME}/.config/wezterm/wezterm.lua
Quick Start
Configration — Wez’s Terminal にある通り、以下のような母体となる Config を作成します。
-- Pull in the wezterm API
local wezterm = require 'wezterm'

-- This will hold the configuration.
local config = wezterm.config_builder()

-- This is where you actually apply your config choices

-- For example, changing the color scheme:
config.color_scheme = 'AdventureTime'

-- and finally, return the configuration to wezterm
return config
WezTerm の設定はここから始まります。
それではさっそく
wezterm.lua の簡単な説明
基本的には設定追加箇所は先ほどの初期設定ファイルのこちらの行の下に入れていきましょう。
-- This is where you actually apply your config choicesここから具体的な説明
automatically_reload_config
以下の設定を入れると wezterm.lua の更新を検知して自動的に reload してくれます。
以後の設定変更時に便利なので一番最初に設定しておくと後で楽です。
config.automatically_reload_config = falseautomatically_reload_config – Wez’s Terminal Emulator
window-config-reloaded
もし config reload で window に通知したいなら以下を追加すると通知されるようになります。
wezterm.on('window-config-reloaded', function(window, pane)
  wezterm.log_info 'the config was reloaded for this window!'
end)
window-config-reloaded – Wez’s Terminal Emulator
check_for_update & config.check_for_updates_interval_seconds
WezTerm の更新を検知する設定です。自分は topgrade でまとめて管理しているので動作したことを見た記憶がないけど・・・
-- update
config.check_for_updates = true
config.check_for_updates_interval_seconds = 86400
check_for_updates – Wez’s Terminal Emulator
audible_bell
Terminal の bell を止めたい場合はこちら
-- bell
config.audible_bell = "Disabled"
audible_bell – Wez’s Terminal Emulator
scrollback_lines
スクロールバックできる行数を設定します。
以下はデフォルトの設定ですが、自分はめちゃくちゃ大きくします。
-- scroll backline
config.scrollback_lines = 3500
scrollback_lines – Wez’s Terminal Emulator
macOS Left and Right Option Key
ここは好みの問題になると思いますが以下を参考に設定してください。
-- macOS Left and Right Option Key
config.send_composed_key_when_left_alt_is_pressed = false
config.send_composed_key_when_right_alt_is_pressed = true
config.use_dead_keys = false
Keyboard Concepts – Wez’s Terminal Emulator
use_ime
ime での入力を無効化します。
こちらは true にしておいた方が良いですね。Terminal で日本語入力をすることは稀ではあるけど、、、でもたまに使うので自分は true です。
-- ime
config.use_ime = true
use_ime – Wez’s Terminal Emulator
exit_behavior
終了時の挙動を選択できます。
"Close"– close the corresponding pane as soon as the program exits.
"Hold"– keep the pane open after the program exits. The pane must be manually closed via CloseCurrentPane, CloseCurrentTab or closing the window.
"CloseOnCleanExit"– if the shell program exited with a successful status, behave like"Close", otherwise, behave like"Hold". This is the default setting.
こちらは exit_behavior のオフィシャル説明ですが、CloseOnCleanExit が無難かな。
-- exit
config.exit_behavior = 'CloseOnCleanExit'
exit_behavior – Wez’s Terminal Emulator
exit_behavior_messaging
終了ステータスとメッセージの制御ができます。
"Verbose"– Shows 2-3 lines of explanation, including the process name, its exit status and a link to the exit_behavior documentation.
"Brief"– Like"Verbose", but the link to the documentation is not included.
"Terse"– A very short indication of the exit status is shown in square brackets.
"None"– No message is shown.
exit_behavior_messaging – Wez’s Terminal Emulator
color_scheme
WezTerm の Theme を設定します。
自分は Dracula+ を利用しています。
-- This is where you actually apply your config choices
-- config.color_scheme = "Dracula (Official)"
-- config.color_scheme = "Dracula (Gogh)"
config.color_scheme = "Dracula+"
自分は選択した文字列が見づらいので微調整してます。
config.char_select_bg_color = "#282A36"
config.char_select_fg_color = "#F8F8F2"
Color Schemes
Color Schemes の一覧はここにあります。
2024/03時点では965個もあります。すごい!
Color Schemes – Wez’s Terminal Emulator
Dynamic Color Escape Sequences
こちらを参考にしてみてください。自分も一度だけやりましたが・・・かなり目にダメージを受けます。
サングラス必須w
Colors & Appearance – Wez’s Terminal Emulator
gui.get_appearance()
こちらを利用すると OS 側の Light/Dark 設定を継承することができるようです。自分は使ってないので詳細は Official の Document を見てください。
get_appearance – Wez’s Terminal Emulator
Tab Bar Appearance & Colors
tab bar 関連の設定は以下です。
自分は最大幅や fancy_tab_bar の無効化、明るさなどを微調整しています。
Colors & Appearance – Wez’s Terminal Emulator
window:set_right_status(string)
こちらはオフィシャルを見ていただきたいのですが、tab の右側にいろいろなステータスをテキスト表示することができます。
自分は Starship を使っているので細かな Status 表示は必要ないのですが・・・せっかくなので以下を表示しています。
- cwd (current work directory)
- hostname
- localtime
- battery
Starship と被ってたりするんですが、まったく気にしないw
set_right_status – Wez’s Terminal Emulator
window_background_opacity & macos_window_background_blur
背景透過と背景ボカシです。
config.window_background_opacity = 0.3
config.macos_window_background_blur = 20
Colors & Appearance – Wez’s Terminal Emulator
macos_window_background_blur – Wez’s Terminal Emulator
window_frame & window_padding
Window の縁からの余白に関わる設定ですが、背景を半透明にしてるのと window_frame を無効化しているからという理由もあるけど個人的には多少あった方が見やすいかな
Dracula のだと自分は見にくいため微調整してます。
config.window_frame = {
 inactive_titlebar_bg = "#44475A",
 active_titlebar_bg = "#BD93F9",
 inactive_titlebar_fg = "#44475A",
 active_titlebar_fg = "#F8F8F2",
 inactive_titlebar_border_bottom = "#282A36",
 active_titlebar_border_bottom = "#282A36",
 button_fg = "#44475A",
 button_bg = "#282A36",
 button_hover_fg = "#F8F8F2",
 button_hover_bg = "#282A36",
}
window_frame – Wez’s Terminal Emulator
config.window_padding = {
 left = 5,
 right = 5,
 top = 10,
 bottom = 5,
}
window_padding – Wez’s Terminal Emulator
background
window_background_gradient
背景設定です。
自分は画像ではなく window_background_gradient で背景にグラデーションを若干つける設定をしています。
config.window_background_gradient = {
-- Can be "Vertical" or "Horizontal". Specifies the direction
-- in which the color gradient varies. The default is "Horizontal",
-- with the gradient going from left-to-right.
-- Linear and Radial gradients are also supported; see the other
-- examples below
-- orientation = "Vertical",
orientation = { Linear = { angle = -50.0 } },
-- Specifies the set of colors that are interpolated in the gradient.
-- Accepts CSS style color specs, from named colors, through rgb
-- strings and more
-- colors = {
-- "#0f0c29",
-- "#302b63",
-- "#24243e",
--},
colors = {
"#0f0c29",
"#282a36",
"#343746",
"#3a3f52",
"#343746",
"#282a36",
},
-- colors = { "Inferno" },
-- Instead of specifying `colors`, you can use one of a number of
-- predefined, preset gradients.
-- A list of presets is shown in a section below.
-- preset = "Warm",
-- Specifies the interpolation style to be used.
-- "Linear", "Basis" and "CatmullRom" as supported.
-- The default is "Linear".
interpolation = "Linear",
-- How the colors are blended in the gradient.
-- "Rgb", "LinearRgb", "Hsv" and "Oklab" are supported.
-- The default is "Rgb".
blend = "Rgb",
-- To avoid vertical color banding for horizontal gradients, the
-- gradient position is randomly shifted by up to the `noise` value
-- for each pixel.
-- Smaller values, or 0, will make bands more prominent.
-- The default value is 64 which gives decent looking results
-- on a retina macbook pro display.
noise = 64,
-- By default, the gradient smoothly transitions between the colors.
-- You can adjust the sharpness by specifying the segment_size and
-- segment_smoothness parameters.
-- segment_size configures how many segments are present.
-- segment_smoothness is how hard the edge is; 0.0 is a hard edge,
-- 1.0 is a soft edge.
segment_size = 11,
segment_smoothness = 1.0,
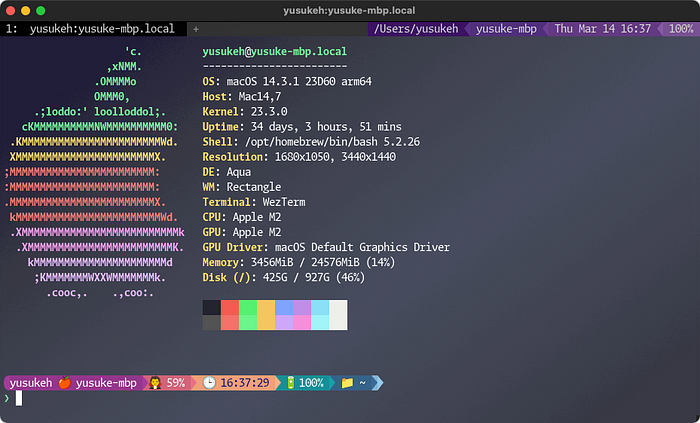
}実際の画面はこんな感じです。
若干斜めにグラデーションが入ってる。わかるかなぁ・・・
まったく必要ないと言われればそれまでなんだけど・・・
最近の mac の画面は Terminal だけなんかめっちゃ古臭い見た目で周りと差が激しすぎるんで、ちょっとグラデーション入れると Window 描画に少しだけ立体感が出て周りの Application Window と馴染みやすい!!!(強めに主張)
window_background_image
自分は設定してません。
ただ背景画像を設定するだけならこちらを参考にしてください。
Colors & Appearance – Wez’s Terminal Emulator
実際にはかなり複雑な配置が可能で複数の画像も設定できます。
自分も WezTerm 使い始めたときに少し凝ってみた時期があるのですが、背景画像が動いて、めっちゃ気が散るのでやめました。
Log とか見てると読めなくなるw
background – Wez’s Terminal Emulator
font
自分は Moralerspace Argon HWNF を利用しています。
ここは IT エンジニアならこだわるところです。
WezTerm が認識している Fonts 一覧はコマンドで出力できます。
wezterm ls-fontsOption もあります。
wezterm ls-fonts – Wez’s Terminal Emulator
以下が自分の今のところの設定です。
結構ちょこちょこいじってるのでちょっとずつ変わってますが・・・
config.font = wezterm.font(
 "Moralerspace Argon HWNF",
 {
   stretch = 'Normal',
   weight = 'Regular',
   bold = false,
   italic = false,
  }
)
config.harfbuzz_features = { 'calt=0', 'clig=0', 'liga=0' }
config.text_background_opacity = 0.95
config.font_size = 16
config.cell_width = 1.0
config.line_height = 1.0
config.use_cap_height_to_scale_fallback_fonts = true

-- This increases color saturation by 50%
config.foreground_text_hsb = {
 hue = 1.0,
 saturation = 1.0,
 brightness = 1.2,
}
Moralerspace は、欧文フォント Monaspace と日本語フォント IBM Plex Sans JP を合成したプログラミング向けフォントです。 – yuru7/moralerspace
Fonts – Wez’s Terminal Emulator
Font Shaping – Wez’s Terminal Emulator
adjust_window_size_when_changing_font_size
こちらは設定した方が良いかもしれない。
macbook で本体と拡張ディスプレイのそれぞれ解像度の違いで font size が変わってしまうことを防いでくれます。
adjust_window_size_when_changing_font_size – Wez’s Terminal Emulator
font_with_follback
Glyphs が見つからない場合の次のフォントを探すためのリストを構成します。
自分はいつかエラーでて困りそうだけど Apple の絵文字を追加してます
wezterm.font_with_fallback – Wez’s Terminal Emulator
Key Binding
自分はあまり Terminal Emulator に機能を求めていないので設定してません。
公式 Document をみているとかなりいろいろできそうなので、チャレンジしてみるのも悪くないかも
Key Binding – Wez’s Terminal Emulator
Hyperlinks
設定をいれると Terminal 上での対象文字列でリンクが貼られます。
あると便利なので入れといた方が良いですね。
Hyperlinks – Wez’s Terminal Emulator
iTerm Image Protocol
WezTerm には iTerm2 の imgcat が利用できます。
iTerm Image Protocol – Wez’s Terminal Emulator
CLI
WezTerm には CLI でサブコマンドが登録されています。
自分はあまり使ってないんですが、replay とか面白そうですね。
CLI Reference – Wez’s Terminal Emulator
まとめ
ざっと紹介してみました。
WezTerm はめちゃくちゃ軽量かつ多機能な Terminal です。
自分はシンプルな使い方しかしてませんが、使い始めて3ヶ月くらい経ちました。特に問題もなく利用できていています。
Lua の設定での奥深さもあるので面白い Terminal だと思います。
自分はおじさんなので Unix like というか Linux like というか・・・
CLI で Config を弄くり倒して自分の設定を作っていく過程が楽しいです。
Hammerspoon とかとの組み合わせも楽しいかもしれないですね。
シリーズ記事一覧
転載:ターミナルがダサいとモテない。WezTerm 紹介編(Medium)